How to Draw Anime and Manga Noses
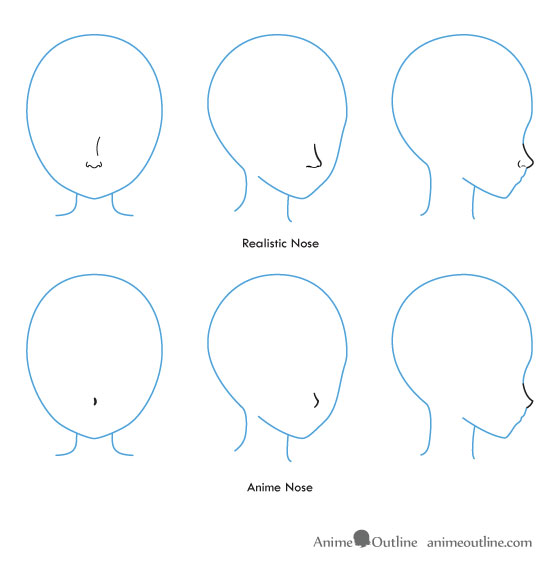
This tutorial explains how to draw anime and manga noses from the front, side and 3/4 views in different styles.
Drawing Anime and Manga Noses
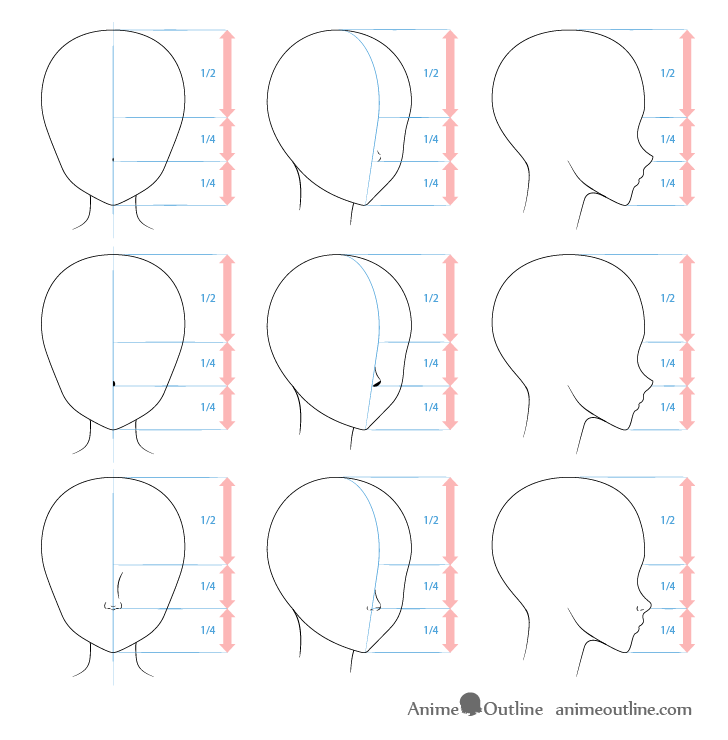
If you would like more information on how to position the nose on the head you can check the How to Draw an Anime Girl’s Head and Face tutorial.
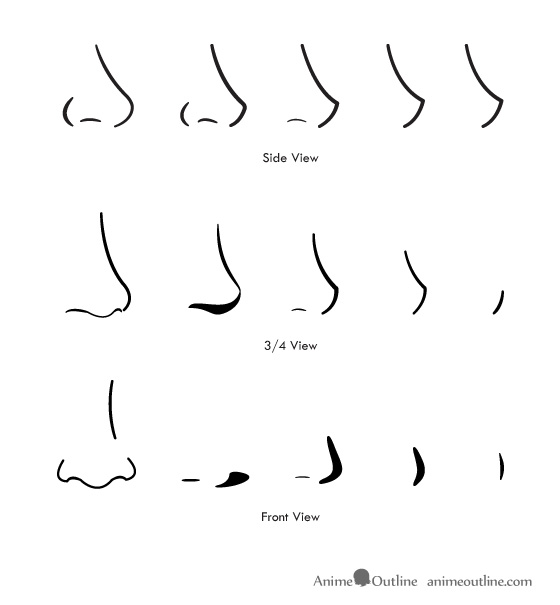
Some defining feature of anime and manga noses are that they tend to be small and pointy with details like the nostrils often not drawn at all. Of course there are also quite a few variation to the style some of which are shown above.
For this tutorial we will split the noses into tree main types:
- Basic nose drawn with just lines
- Nose defined with a shadow
- Semi-realistic nose
Drawing a Basic Anime or Manga Nose
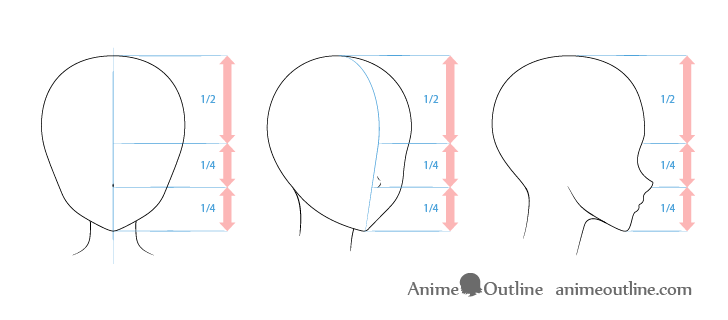
This is the most simple style of anime noses and the easiest to draw.
Basic Nose Front View Drawing
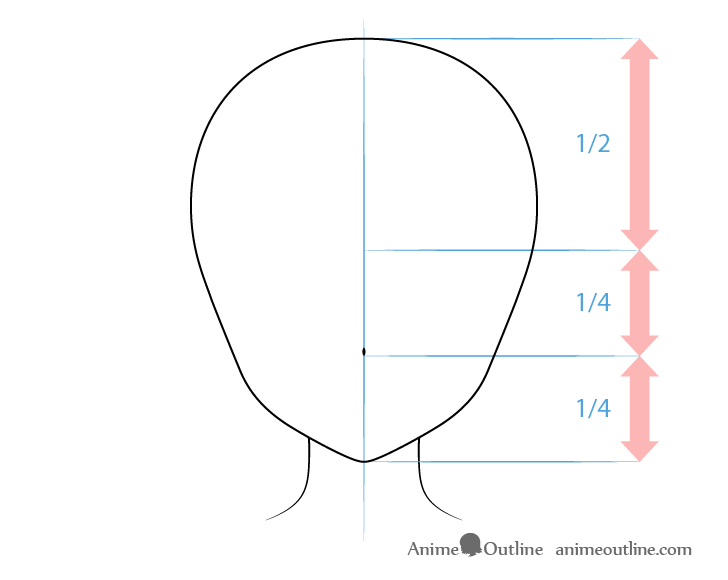
For the front view of the most basic nose you can simply draw it as a dot or a dash. Depending on how simplistic you want the style to be you can even not draw the nose when showing the head from the front.
A good guideline for placing the nose is to first vertically and horizontally divide the head in half. For the vertical positioning draw this type of nose directly in the middle of the head. For the horizontal position draw it between the horizontal halfway point and the chin.
You can place the nose slightly higher or lower based on style and the type of character you want to create but generally try and keep it close to the area described above. This will be discussed in a little more detail later on in the tutorial.
Basic Nose 3/4 View Drawing
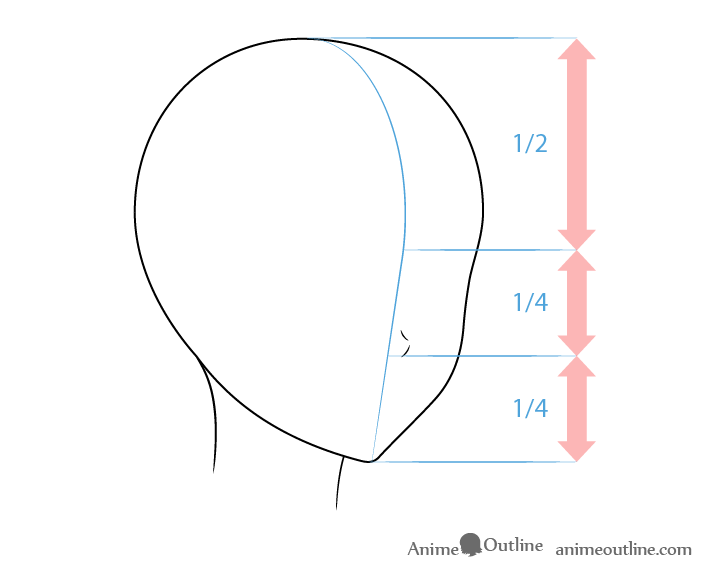
For the 3/4 view you can keep the vertical placement of the nose the same as for the front view. The vertical placement of the nose will be the middle of the face. You can roughly estimate where this will be by projecting a line down from the curve of the forehead to the bottom of the chin.
As you are really only drawing the end of the nose position it some distance away from this line so that the empty space leaves enough room to fit the full thing (if it were actually drawn out).
You can give a hint of the nose with just two curved lines as shown in the example above. Alternatively you can also only draw the top curve or even just a dot/dash similar to the front view.
For drawing the head in 3/4 view see:
How to Draw an Anime Female Face 3/4 View
Basic Nose Side View Drawing
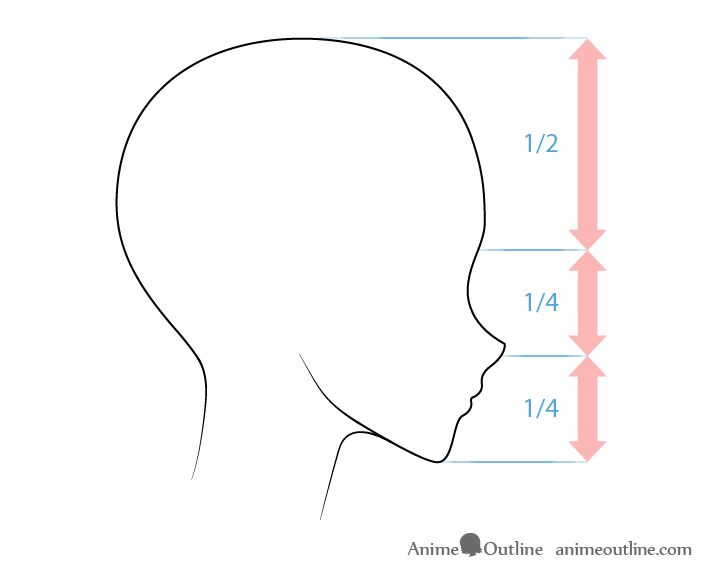
For the side view again be sure to keep the vertical placement of the nose as described earlier and as shown in the above illustration. A common mistake beginners make is misplacing facial features when drawing the same character from different views.
It’s hard to have a clear placement guide for the horizontal positioning of the nose in the side view as this can be effected by the face type, nose length and style. Generally however you will want to draw it sticking out past the forehead.
Make the actual shape of the nose somewhat like a vertical check mark with a short bottom curve, a pointy tip and a long upper curve.
Drawing an Anime or Manga Nose Using Light and Shadow
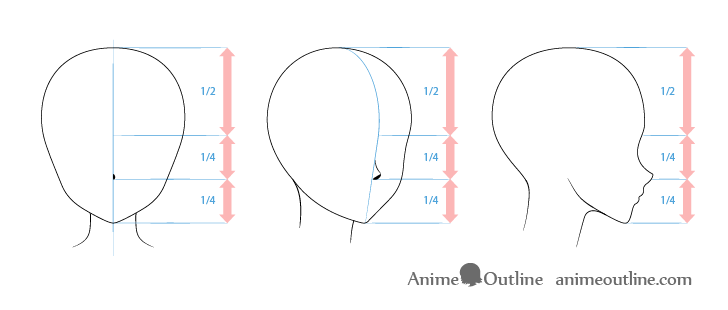
Another common way to draw an anime nose is with some very basic shading. You can make this completely black or a grey/darken skin tone depending on weather you are using color not not.
Shaded Nose Front View Drawing
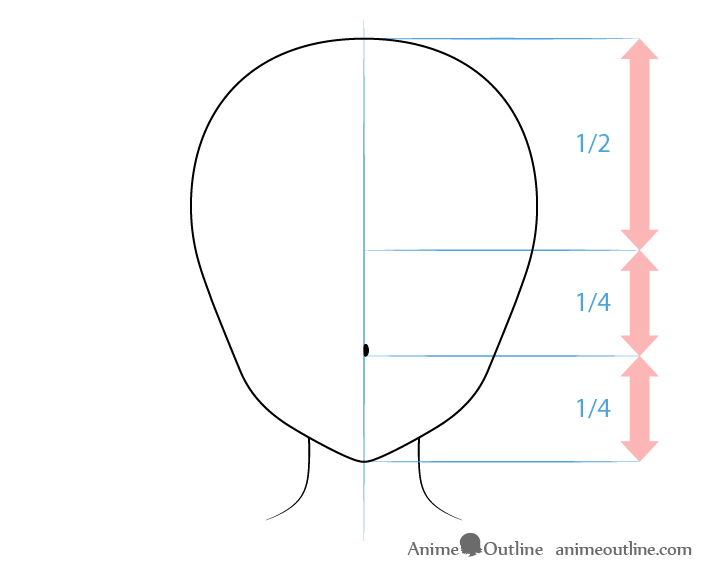
In the front view divide the head in half both vertically and horizontally (same as the first example of the tutorial). Draw the nose shadow to one side of the vertical line with it’s horizontal placement between the chin and the horizontal halfway point of the face.
Shape the shadow itself a bit like an oval with the side facing towards the horizontal line being slightly flatter.
Shaded 3/4 View Drawing
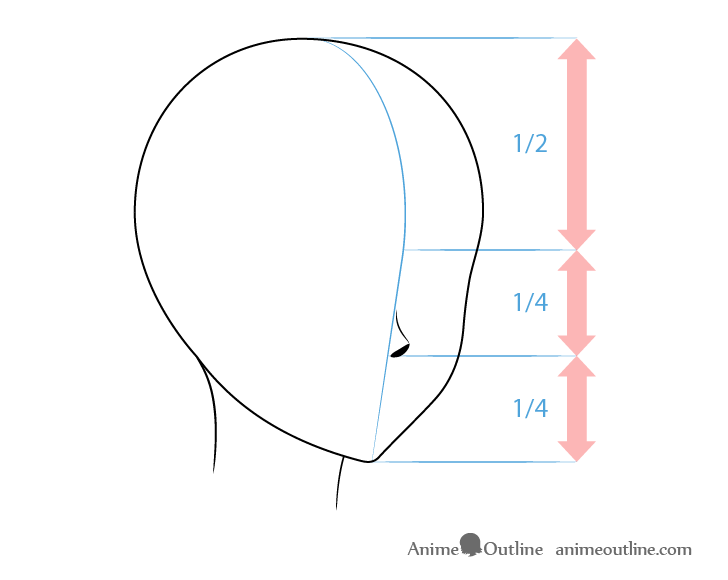
For the 3/4 view you can again place the nose as described in the first example. Positional it horizontally between the halfway point of the head and the bottom of the chin with the vertical placement based on a line projected from the forehead to the chin.
Shade the the bottom part of the nose with a shadow that is wider at the base of the nose and narrower at the tip. Draw the upper part of the nose with a simple curve and keep the tip pointy.
Unlike the basic nose example you can make the the upper curve slightly larger and more defined so that it does not get “lost” compared to the large shaded area.
Please note that this nose shading applies to general/common lighting conditions. If you want to shade the nose/face in more unusual lighting see:
How to Shade an Anime Face in Different Lighting
Shaded Side View Drawing
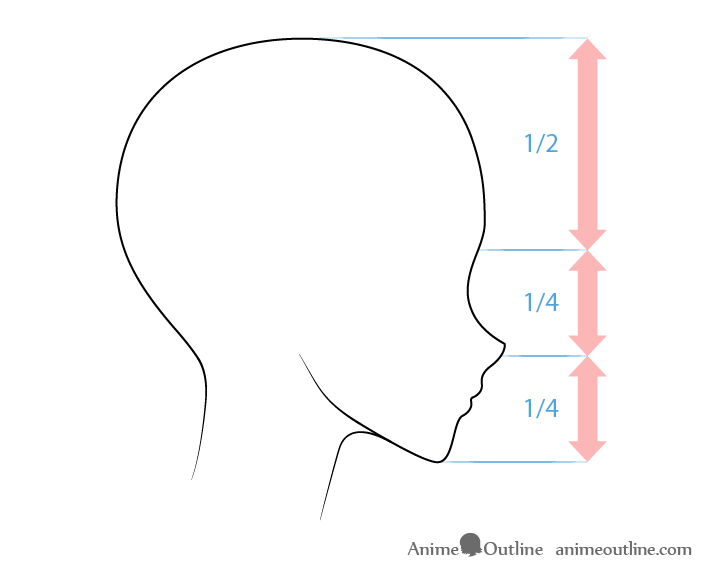
For the side view of the “shaded nose” you can actually draw it without any shading (exactly the same as the side view of the first example) . As the shadow is used to help define the nose there is no need for it in a view where the silhouette of the nose is already well defined.
In general the “shaded style” of anime/manga noses may be more appropriate if you want to create somewhat serious looking artwork but still retain the anime or manga look. It’s also sometimes used when showing closeups of character’s faces.
Drawing a Semi-Realistic Looking Nose
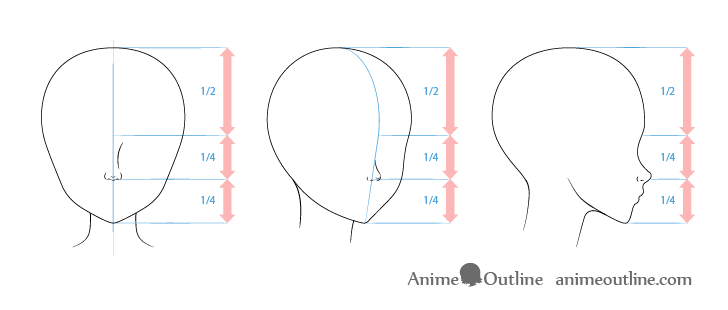
For a more realistic looking anime nose draw it closer to traditional art. With more curvy lines and greater attention to detail. You can also show the nostril/nostrils in all views.
Semi-Realistic Nose Front View Drawing
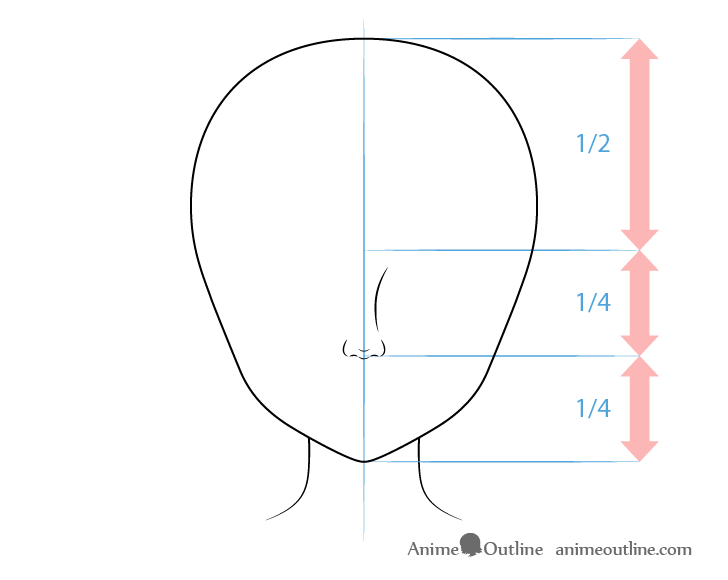
Same as the previous two example for the front view of the realistic nose first divide the head in to halves both horizontally and vertically. Draw the nose with it’s bottom at the halfway mark between the horizontal halfway point of the head and the bottom of the chin. Use the vertical halfway point to center the nose on the head.
Draw both sides of the bottom of the nose exactly identical but give a hint of the bridge of the nose on one side only. If you were to shade the drawing this should be the “shadow side”. The reason you want to only show one side of the bridge is because showing both will simply make your drawing look odd (you can try it for yourself).
Semi-Realistic Nose 3/4 View Drawing
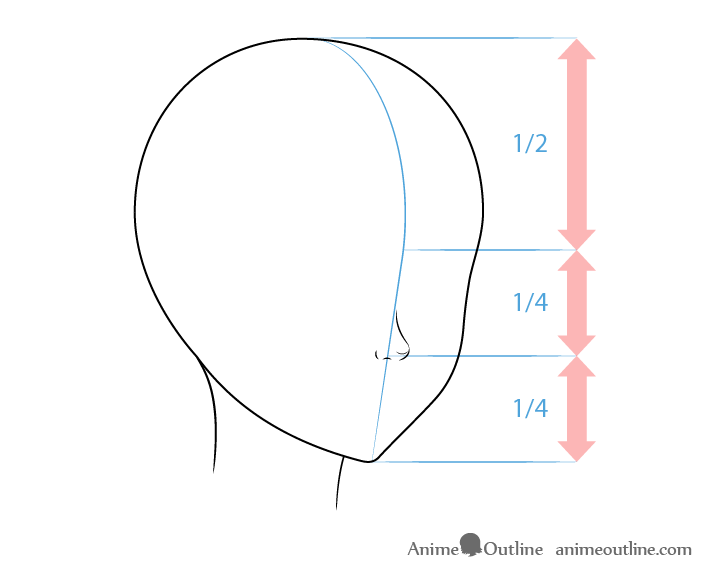
For the 3/4 view again position the nose as in the previous two example by projecting a line down from the forehead to the bottom of the chin.
Draw the bottom and bridge of the nose with curves similar to the first example but make these a little longer so that they define more of the noses shape. Also give a hint of the nostril and optionally outline the tip of the nose with an under curve.
Semi-Realistic Nose Side View Drawing
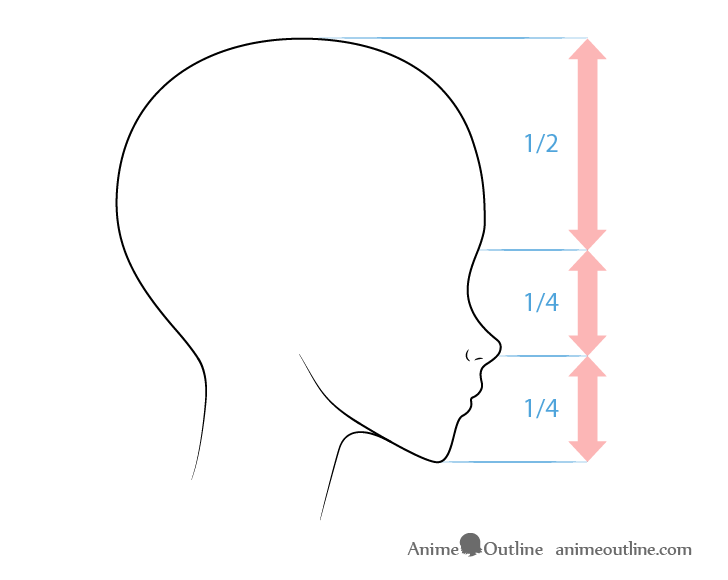
Yet again as for the two previous examples position the semi-realistic side view nose roughly between the horizontal halfway point of the head and the bottom of the chin. Horizontally the nose should go slightly past the forehead.
Draw the tip of the nose with a curve (not pointy) and give a hint of the nostril.
Anime Noses Positioning
As mentioned earlier the positioning of anime noses can vary depending on style and character.
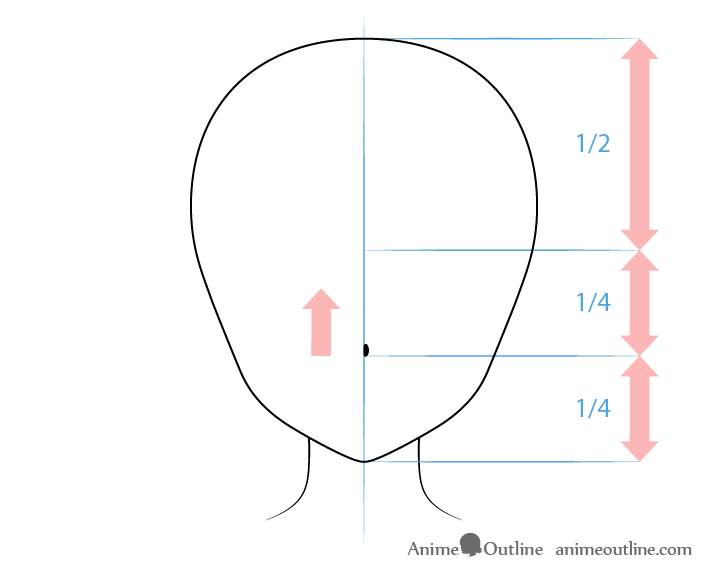
In the above example of a slightly more realistic face the nose is drawing higher up.
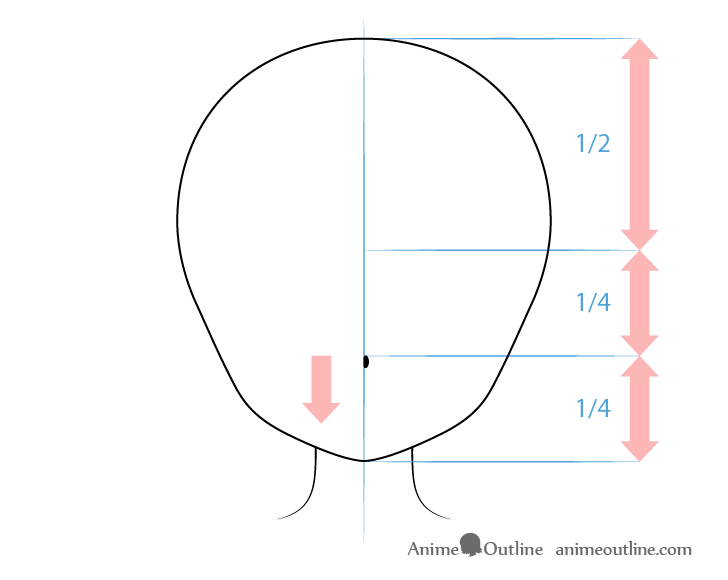
In more stylized characters as this other example the nose may often be drawn lower down.
Please keep in mind that these placement examples are just general guide lines. There is no one exact set of rules for drawing noses. Some artists can have fairly odd looking characters while others may be closer to the examples in this tutorial.
You can see the nose lower down on the face on a more stylized head above.
Conclusion
Drawing anime noses in any view is generally not very complicated. Also the more stylized the nose the easier it tends to be to draw.
You can experiment by adding or remove details or by drawing them with various degrees of realism (as shown at the start of the tutorial) and see if you get a style that you like.
For drawing other anime facial features see:
Posting Komentar untuk "How to Draw Anime and Manga Noses"