How to Draw an Anime Cat Step by Step
This step by step tutorial shows how to draw a sitting anime style cat or kitten from the front view with illustrated examples for each step.
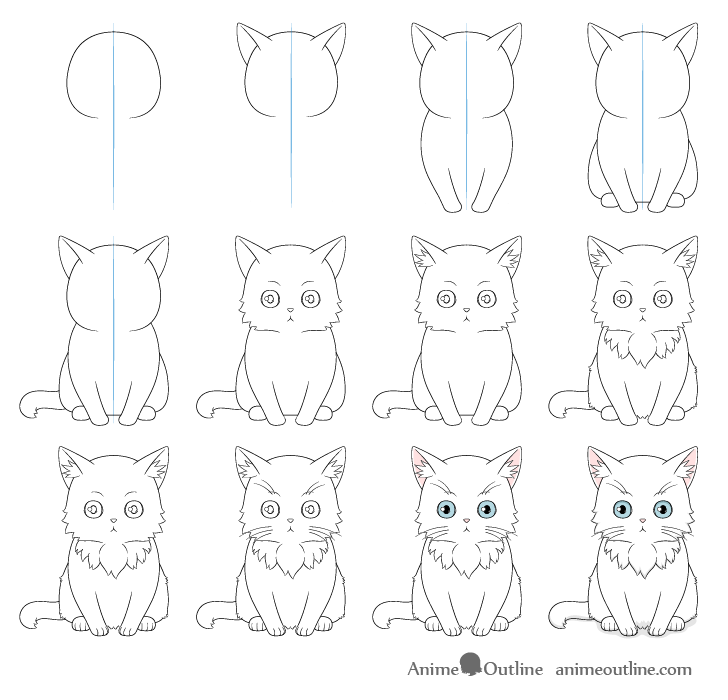
Please note that there will be some see through lines in different steps of the tutorial as different parts of the cat’s body are drawn on top of one another. You can erase these at the end of each step before moving on to the next step.
You may also want to see:
How to Draw Anime Cat Girl Ears Step by Step
Step 1 – Anime Kitten Head & Body Proportions
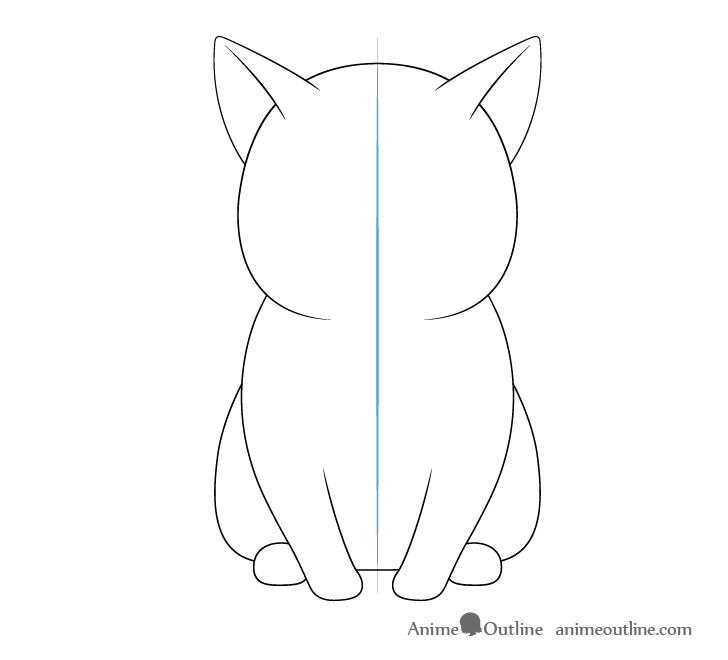
It’s harder to have clear proportions for drawing anime animals but in general anime animals tend to have bigger heads in relations to their bodies same as human anime characters.
Before you begin drawing the cat make a vertical line through the middle of what will later be the cat’s body. Draw the line a slightly to one side of your drawing area to leave room for the tail in in the next step.
The vertical line can help you make sure that both halves of the body are of roughly even width.
Draw the shape of the head close to an oval but wider towards the bottom.
Draw the body similar in shape to a drop of water but with a flattened bottom.
Step 2 – Draw the Legs, Tail and Ears
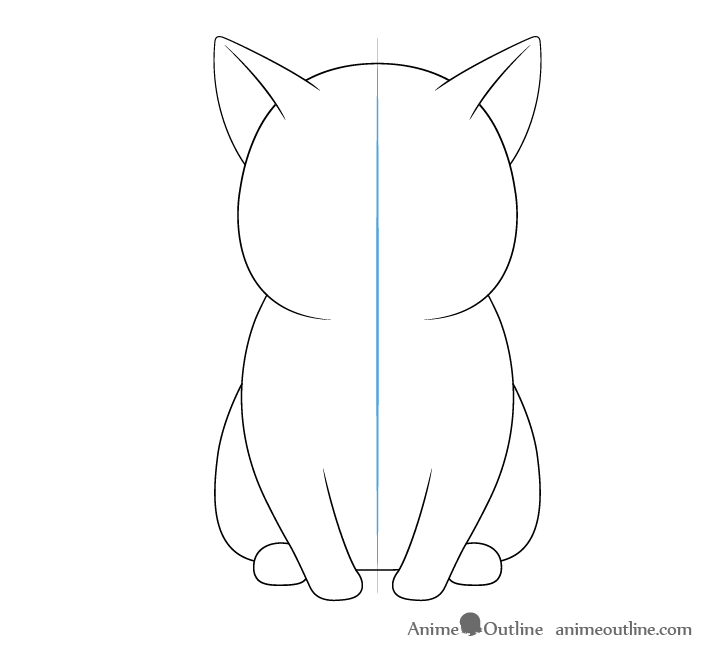
Draw the outer shape of the ears somewhat similar to triangles in shape.
For a more stylized anime look draw the legs smaller and shorter than you would for a real cat.
Finally add the tail.
Step 3 – Draw the Cats’s Face
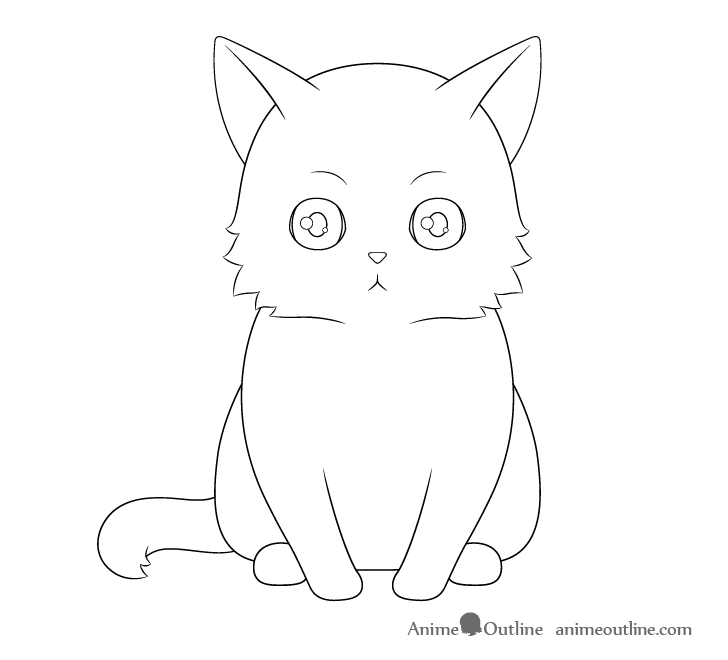
Before drawing the cat’s face draw a horizontal line through the head to help you insure that the eyes are on the same level.
Draw the cat’s face in a typical anime style with bigger than normal eyes and smaller nose and mouth.
- Draw the eyes with very large irises (almost the side of the entire eye).
- Draw the pupils as a pair of vertical ovals.
- Add some reflections inside the eye (a large one for the main light source and a small one for the secondary one).
- Draw the nose as a triangle with rounded corners.
- Draw the mouth as an upside down “Y” shape.
- Draw the front side of the ears slightly overlapping the top of the head.
Step 4 – Draw the Major Fur Clumps
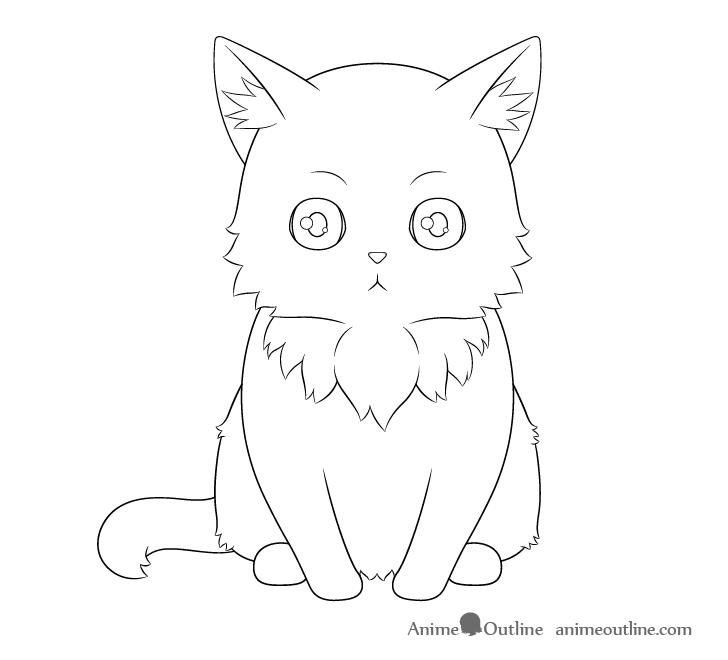
Draw the cat’s fur in large clumps similar to an anime character’s hair.
The major clumps will be on the bottom sides of the kitten’s head (kind of like cheeks) and on the neck, end of tails and chest (where particularly fluffy cats tend to have a mane).
Draw the clumps pointed in slightly different directions and of varying sizes to make the fur look more natural.
Step 5 – Draw the Whiskers & Paws
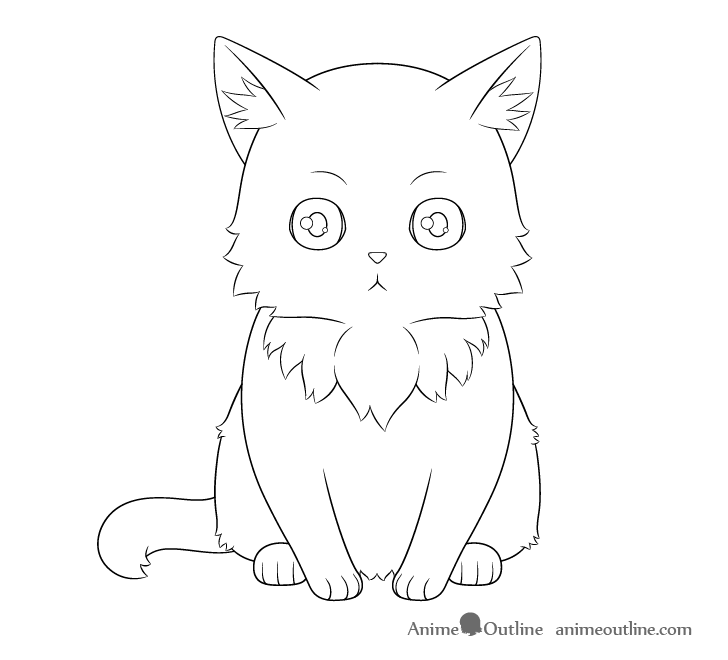
Draw the some whiskers around the mouth and above the eyes and draw some diviner lines into the paws to show the individual toes.
Step 6 – Draw Some Small Fur Clumps
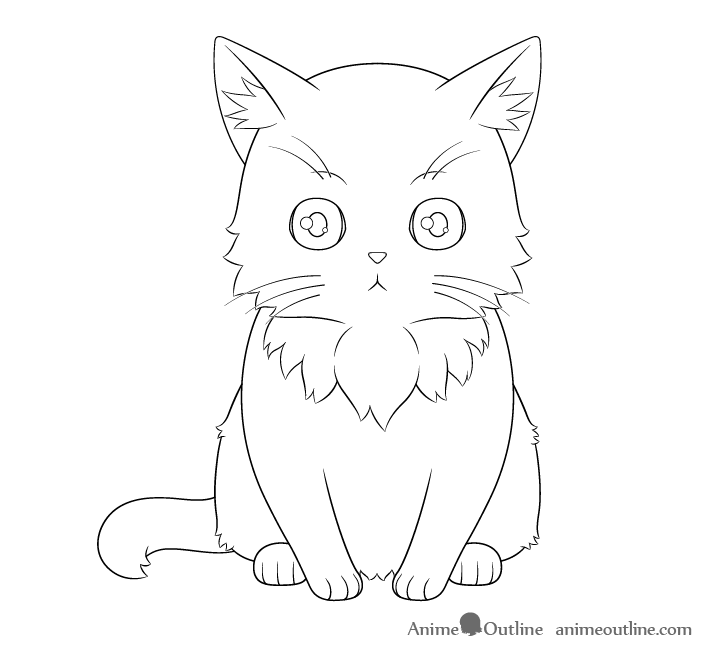
To make the cat/kitten look a little more fluffy you can also add some smaller clumps throughout it’s body. The places where the fur tends to stick out for a cat area usually curves in it’s body.
Step 7 – Apply Color
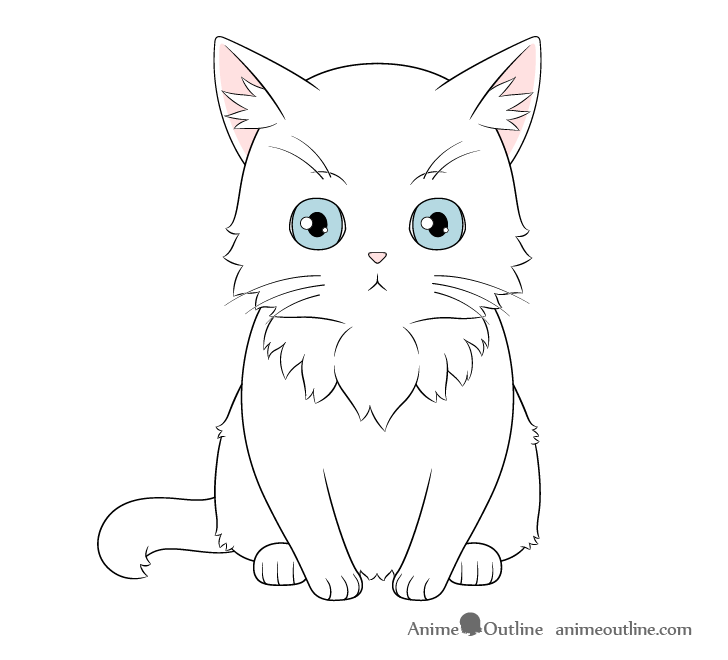
In this case the cat will mainly be white in color but you can use whatever color you like.
Kitten’s tend to have blue/grey eyes when they are younger so you may want to color accordingly.
Finally color the inside of the ears pink as those tend to have little hair making the skin visible.
Step 8 – Add Shading
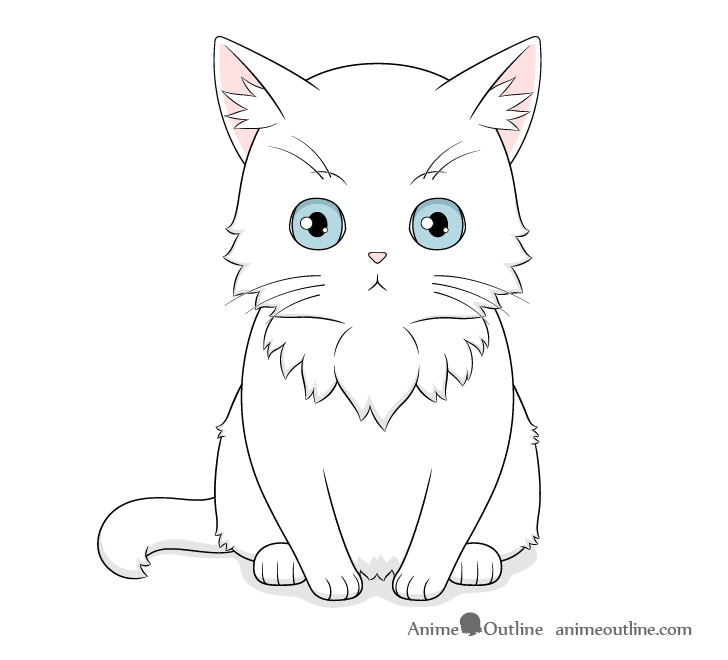
The shadows will depend on the light source but generally the light tends to come from above so you can add the shadow on the bottom if you just want some very basic shading.
Draw the shadows sort of tracing along the shape of the cat’s body.
Conclusion
There are a lot of variations in the anime style especially when it comes to drawing animals as some tend to be drawn closer to real animals while others tend to have almost human like features.
If you need more help drawing anime animals it can be a good idea to take a look at some real animals as well as the work of other artists.
For more on drawing anime animals see:
Posting Komentar untuk "How to Draw an Anime Cat Step by Step"