How to Draw Anime Weather (Snow, Rain & Wind) Tutorial
This tutorial shows how to draw anime and manga style snow, rain, and wind. Each one is broken down into a step by step explanation.
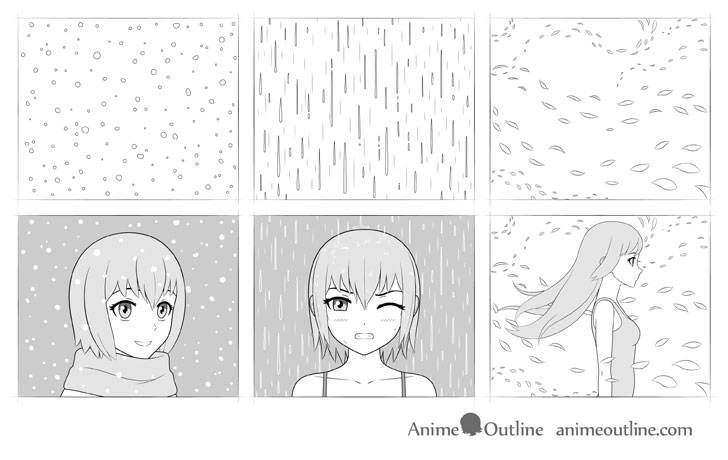
Various weather effects are very common and very important to anime and manga. They can help create a certain scene, set a particular mood or show what season it is.
This tutorial shows some tricks you can use for drawing better looking scenes using weather effects and suggests what types of scenes you may wan to use them for.
How to Draw Anime Snow Step by Step
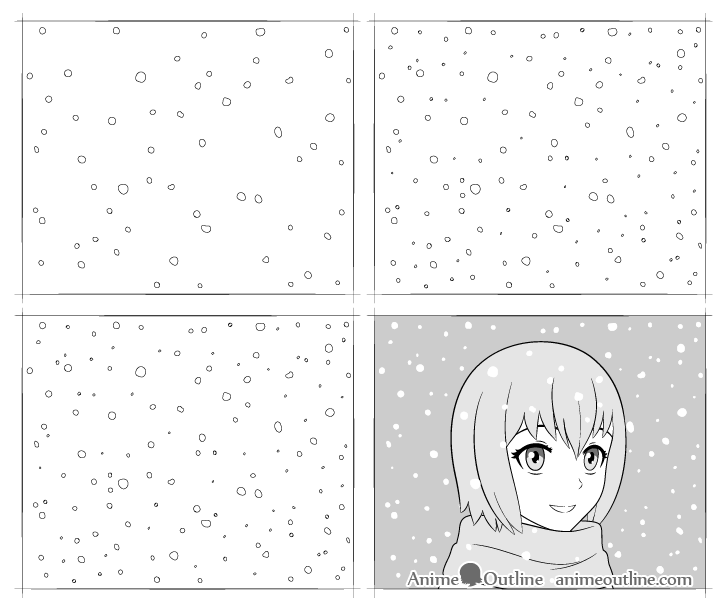
Snow is probably the easiest effect in this tutorial. Large slow falling snowflakes like the ones in this example are very common in scenes that set a holiday or romantic mood.
Step 1 – Draw the Largest Snowflakes
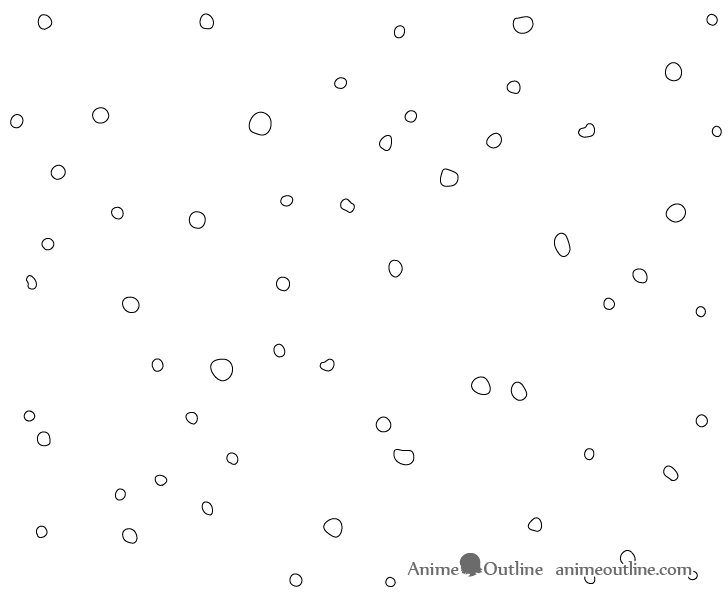
Start by first drawing the larger and medium sized snowflakes distributing them through the drawing area. The shapes you draw for these can be fairly random but try and keep them somewhat smooth without jagged edges.
These will be the “foreground” snowflakes. Meaning that they will be larger because they are closer to the viewer. The reason why this is important will be explained a little bit later on in the tutorial.
Step 2 – Add More Medium Sized Snowflakes
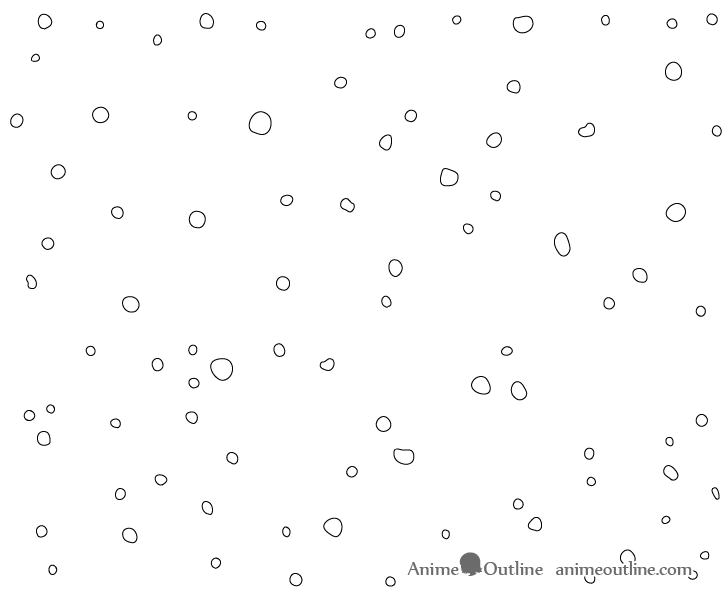
Add some more medium sized snow flakes to the drawing to fill out the foreground. Draw some of them in small clusters around the larger flakes and some in various places on their own. The goal is to try and make the falling snow look natural so try and avoid drawing snowflakes that are too evenly spaced/sized/shaped.
Step 3 – Draw the Background Snowflakes
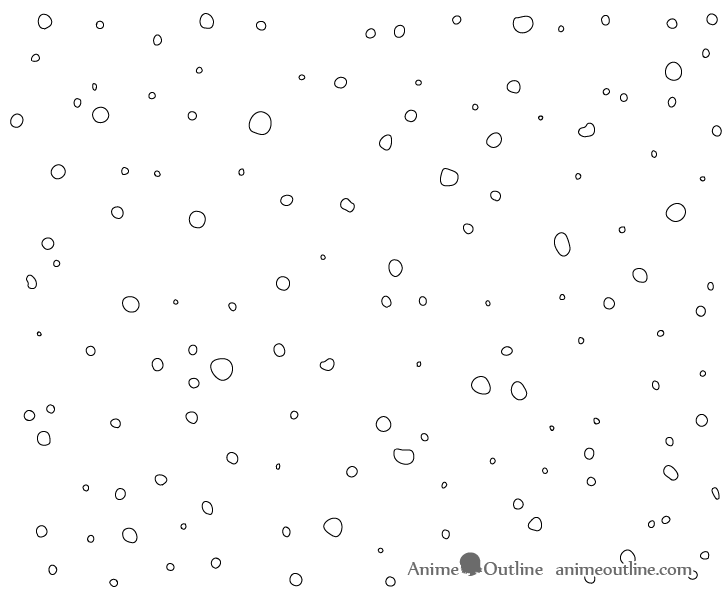
Finally draw some really small snowflakes to fill the empty areas between the larger ones. These will be the “background” snowflakes.
Drawing a Character in a Snowfall Scene
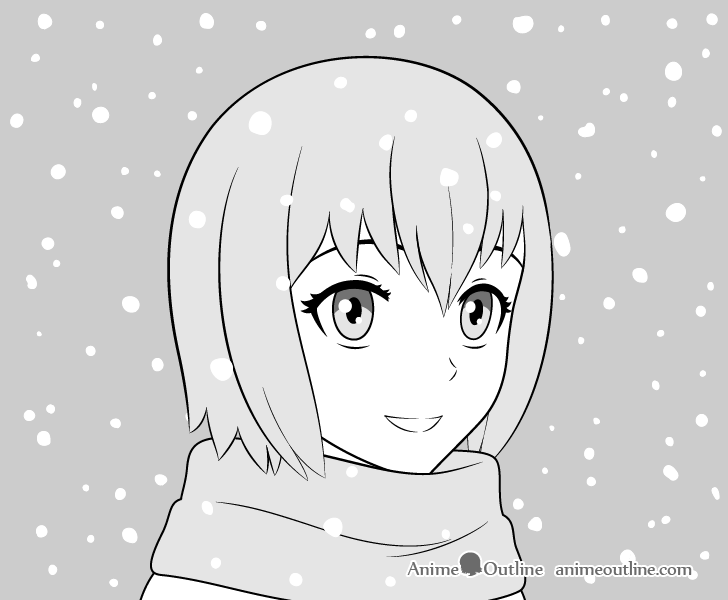
Now if you want to draw an actual character with the snowfall scene (draw them before the snow) like in the above example the foreground/background snowflakes become a little more important. You will want to draw the larger snowflakes from the first two steps in front of the character while the small background snowflakes should be hidden behind them. This will give your drawing some depth.
Another thing to note is that generally you will want to draw the falling snow on a darker background and make the snowflakes white without dark outlines around them. You can outline the snowflakes when you first draw them but then simply blend the outlines into the background when you shade or color around them. If you are drawing digitally then simply draw the snowflakes over top of the scene. You can also alternatively do this on paper with white non transparent paint or a white correction pen.
For tutorials that show how to draw an anime character in 3/4 view similar to the one in the example see:
How to Draw Anime Rain Step by Step
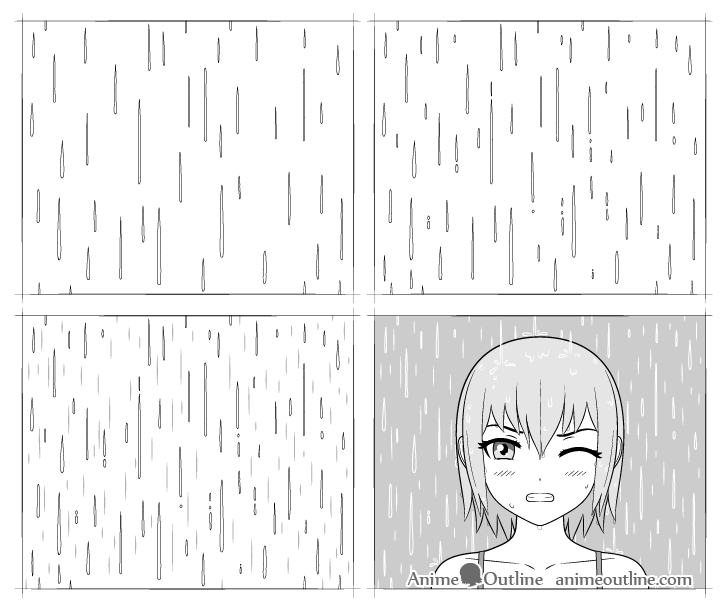
Drawing rain is somewhat similar to the previous example of drawing snow but with some small differences.
Heavy rainfall in anime and manga is often used to create more dramatic scenes. These can be both positive and negative. For example it can be a character walking alone in the rain after something bad happens or a dramatic confession.
Step 1 – Draw the Foreground Raindrops
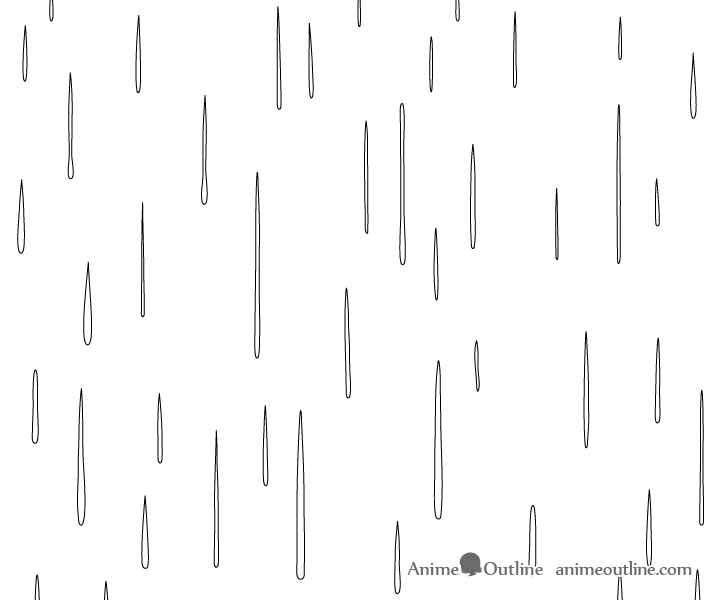
Start by drawing out the larger to medium sized raindrops and distributing them somewhat evenly throughout the drawing area. Draw most of the drops a bit more “bottom heavy” with narrower tops. Make some drops fairly long and others much shorter. Similar to the snow these will be the “foreground” drops.
Step 2 – Add More the Medium Sized Raindrops
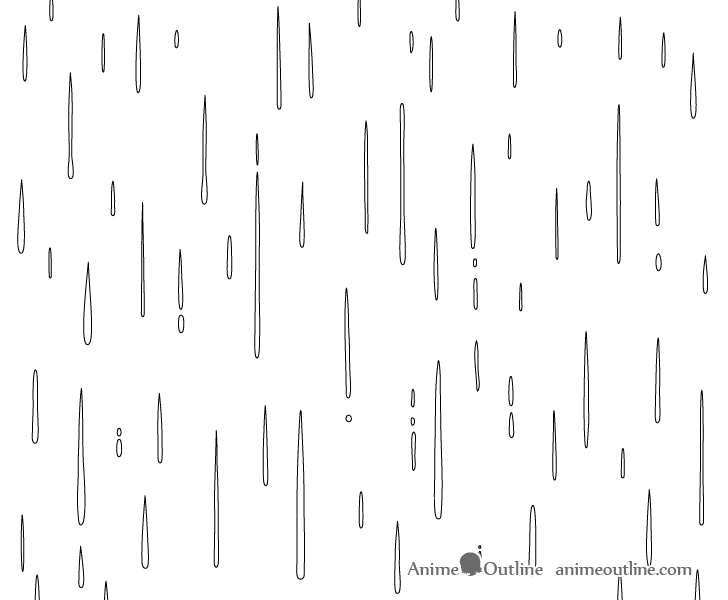
Draw in some more smaller sized/shorter drops. Also draw a few of the drops sort of breaking up into several parts to give them even more variety.
Step 3 – Draw the Background Raindrops
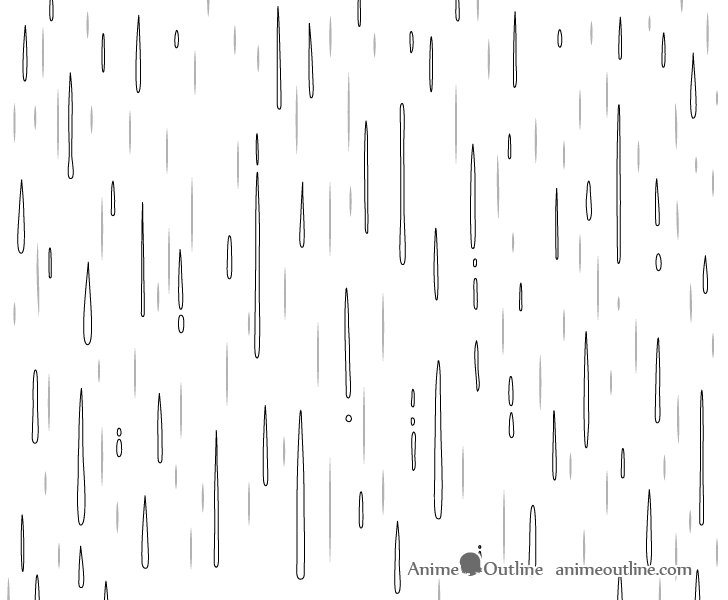
To finish the rain drawing add the “background” raindrops as simply lines of varying length.
it should also be noted that quite often rain in anime and manga is drawn entirely with just a single line for each drop. This is also an option that you can use if you prefer to. However in close up scenes like the one below larger more detailed raindrops will usually make for a better looking drawing.
Drawing a Character in the Rain
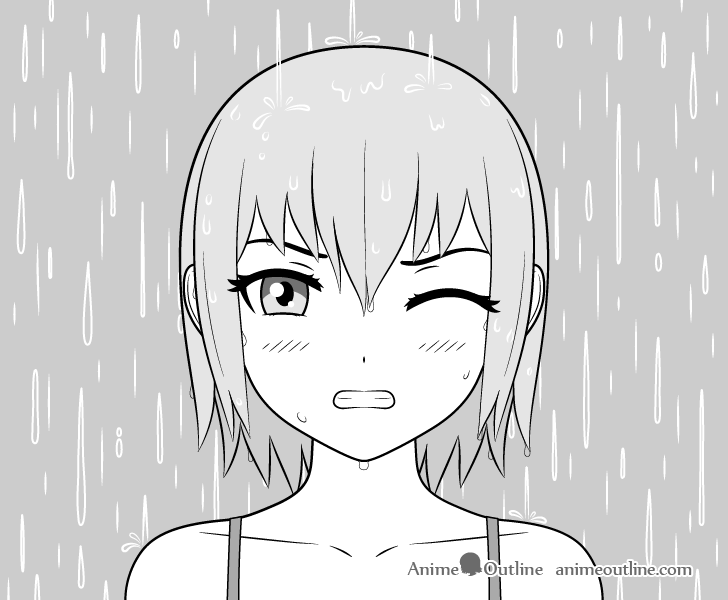
If you want to draw an anime/manga character in the rain then draw them before the drops. Similar to the example of the snow the small background raindrop should be hidden behind them. You can draw the larger drops actually hitting the character and making little splashes as shown above.
Like snowflakes raindrops tend to look better drawn in white on a dark background. Unlike the snowflakes you can draw the large raindrops with just a white outline without needing to fill in the entire thing.
If you are drawing using pencil and paper it can be too much work shading around the outline of each drop so either draw them with dark outlines or get a white correction pen and add them in over top of your pencil drawing.
For a detailed explanation of drawing wet anime hair like in the example see:
How to Draw Wet Anime Hair Step by Step
For drawing blush see:
How to Draw Anime & Manga Blush in Different Ways
How to Draw Anime Wind Step by Step
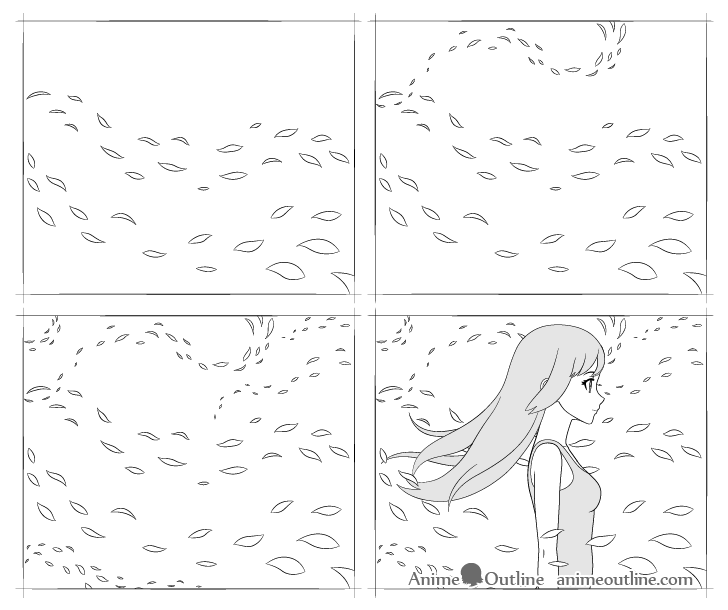
Wind is probably a little more complex to “show” in comparison to rain and snow. As you can’t really see it you will have to add some sort of objects into the scene being blown around to show it. These can be just about anything but leaves, petals, paper or feathers are fairly common.
Wind has many applications in anime and manga. Some scenes can be dramatic like a character struggling trying to walk against it in a heavy snowstorm. Some can be romantic like cherry blossoms in a spring breeze.
The example in this tutorial applies more to the latter.
Step 1 – Draw the Front Wind Streams
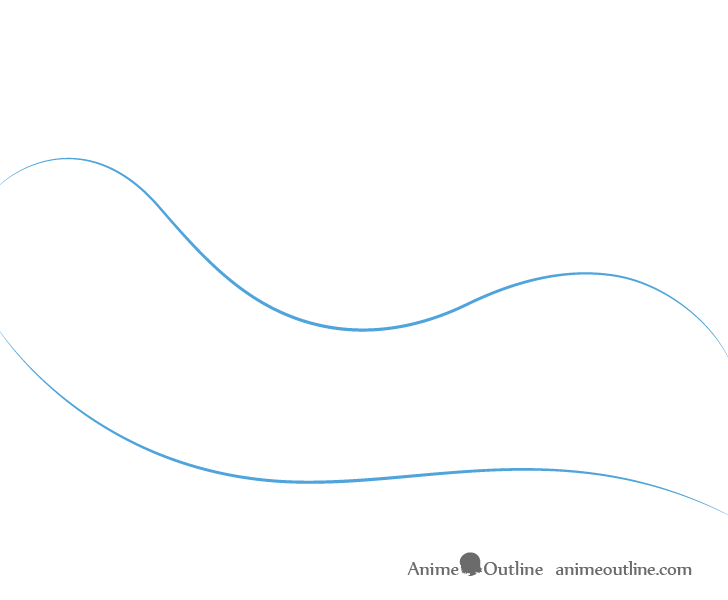
To make it look more like wind and not just like falling leaves or petals draw the objects along a sort of paths or wind streams. You can either make some light lines similar to the example to help guide and draw the leaves/petals over top of these or just picture them in your head.
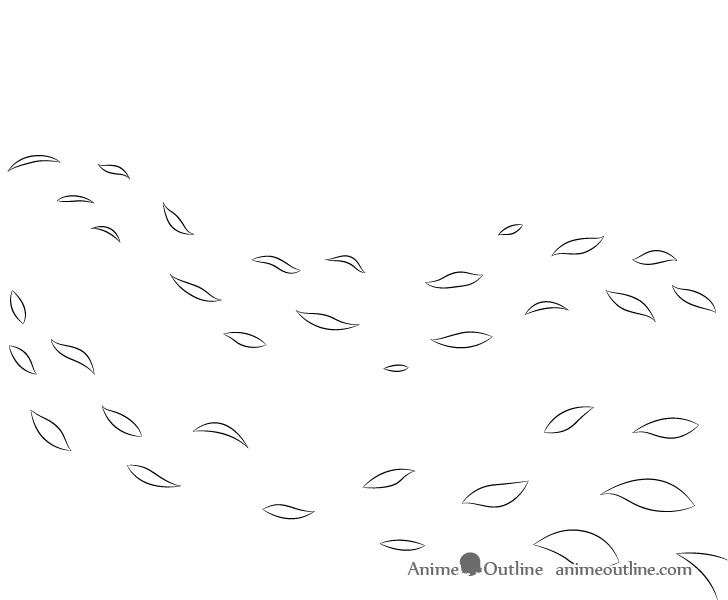
For the sake of this tutorial we will draw some somewhat abstract looking objects that can be either petals or leaves.
Start by drawing the foreground and/or closer background leaves. Basically just draw the larger streams of wind first.
Step 2 – Draw the Farther Back Wind Streams
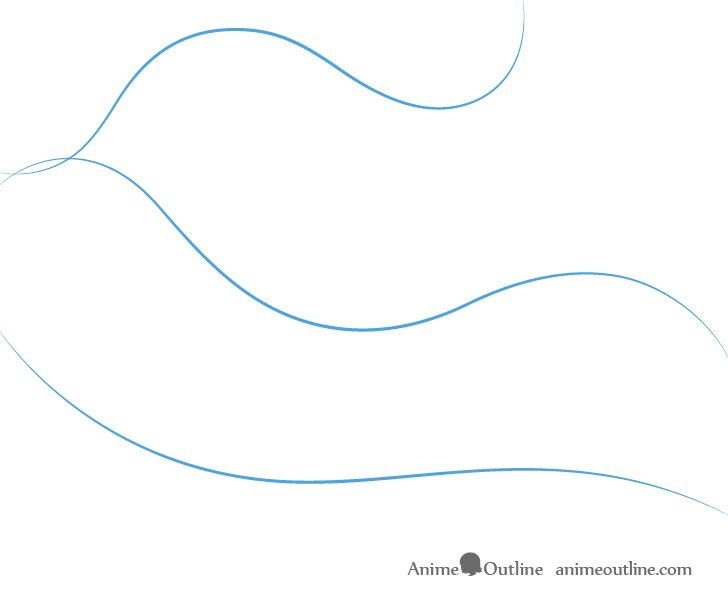
Add more lines for more wind streams that will be farther in the background.
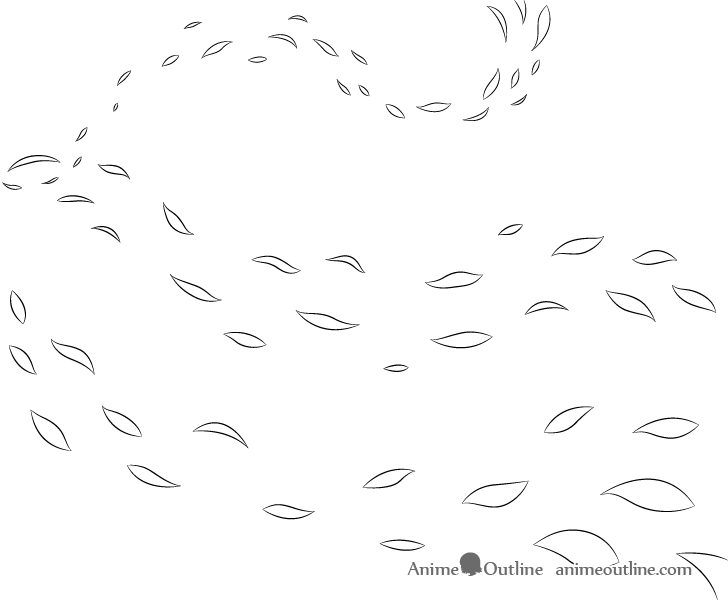
Draw the farther back leaves leaves/petals along those as well.
Step 3- Draw the Background Wind Streams
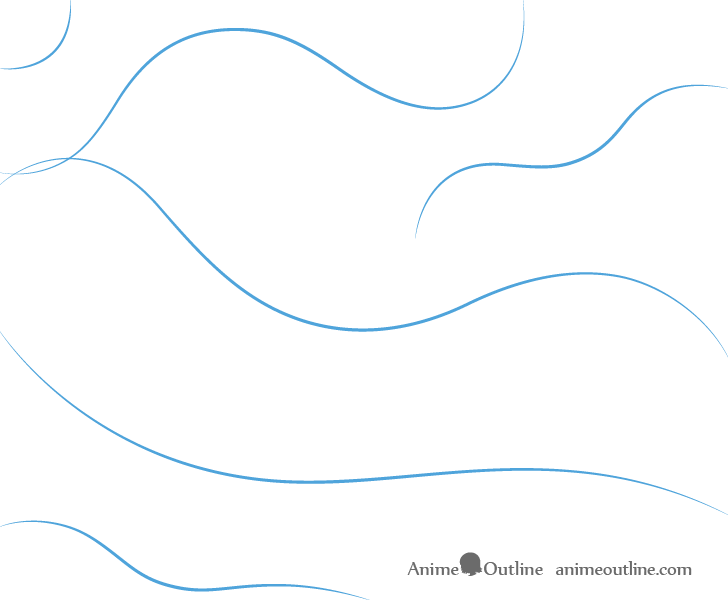
Finally add the very far back streams of wind. You can again optionally first draw them out with lines as in the example.
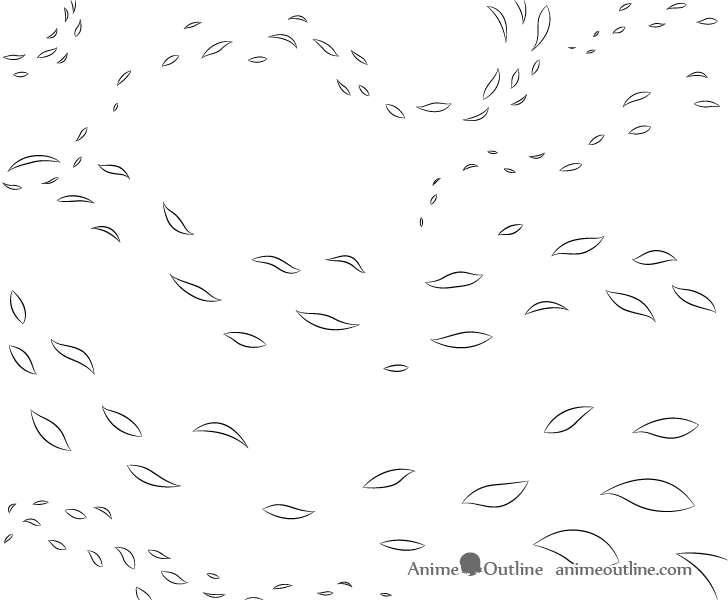
All of the leaves should vary slightly in size but the leaves in the background should on average be the smallest.
Drawing a Character in the Wind
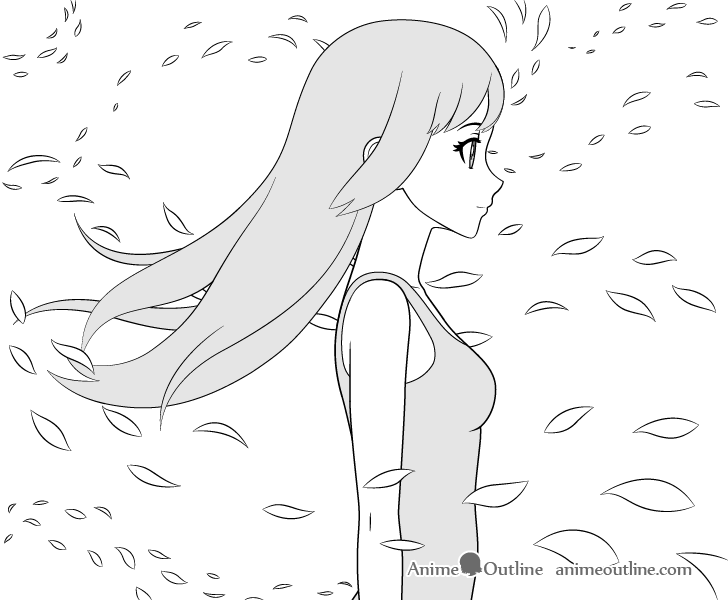
Same as for the rain and snow if you wish to draw a character in the wind you should draw them before the objects.
For this example only the largest stream of leaves/petals is in front of the character the second largest ones is right behind her . The rest are farther in the background.
With the addition of the characters hair also waving in the wind the above picture really conveys the idea that this is actually wind blowing and not just falling leaves/petals.
For drawing anime hair blowing in the wind see:
How to Draw Anime Hair Blowing in the Wind
Conclusion
Weather effects such as snow, rain and wind are very common in anime and manga. They are also not very difficult to draw though it may be a little time consuming depending on the amount of detail you want to put into drawing each snowflake/raindrop/leaf/petal, etc… Hopefully you enjoyed this tutorial.
For other tutorials on things related to anime and manga see:
Posting Komentar untuk "How to Draw Anime Weather (Snow, Rain & Wind) Tutorial"